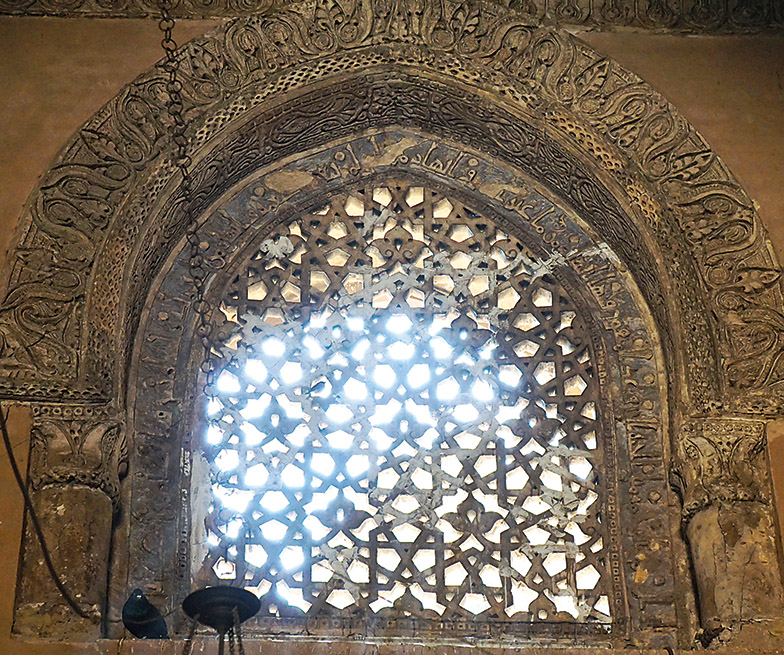
For our next journey into the art of Islamic patterns, we visit Marrakesh, Morocco, where we find a stunning carved stucco design on a wall in the Qasr al-Bahiyah. The design is framed within a niche topped by muqarnas, the characteristic stalactite-like forms that often articulate the transition from a wall to a dome, a vault or, as in this beautiful example, the upper span of an interior niche. Although woven strapwork and vegetal motifs embellish the star pattern, in this installment in this series we focus only on the underlying geometric scheme: a classic arrangement of 12-pointed stars with equilateral triangles between them.
The design overlooks one of the famous riyad gardens, which form their own interconnected, labyrinthine plan together with the rooms and courtyards. The palace was commissioned in 1859 by Si Musa, grand vizier to Sultan Muhammad IV of the ’Alawi dynasty, from which today’s King Mohammed IV of Morocco descends. The palace is famous for its many decorations, which feature not only carved stucco, but also painted cedar ceilings, zillij tile mosaics and marble floors. Completed in 1900, its construction involved materials and artisans from throughout Morocco over four decades, and it is now one of the most well-known architectural attractions in Marrakesh.
The star pattern employs the same harmonic ratio and repeating module using a ratio of 1 to the square root of 3 (1:√3) that was used to produce the pattern in the third installment of this series. This time, however, the 12-fold radial design is of a different character, one for which variations can be found throughout the Islamic world: There are multiple examples in Morocco and southern Spain, where it appears in ceramic, plaster, and even embossed leather. In Anatolia it can be found as a cut-tile mosaic from the Seljuk period, in the 13th century. In Egypt it features in a range of media, most notably in the pierced stone screens produced in the ninth century for one of the world’s oldest surviving mosques, that of Ibn Tulun in Cairo.
Our approach to recreating the design is simpler. Rather than constructing the whole design, here we work with a rectangular module that comprises only one-eighth of the design. Then, by using tracing paper seven times, we flip and invert the design, burnishing and retracing as we go. This completes the full, 12-pointed star tessellation. Modular pattern repetition is indeed a common traditional approach, as shown by evidence in patterns from Iraq and Persia west to North Africa. It has the virtue of great accuracy, as we focus on modular details that we can then repeat to create an expanded design sized to fit our own desired space, whether it is on paper or on a wall overlooking a garden.
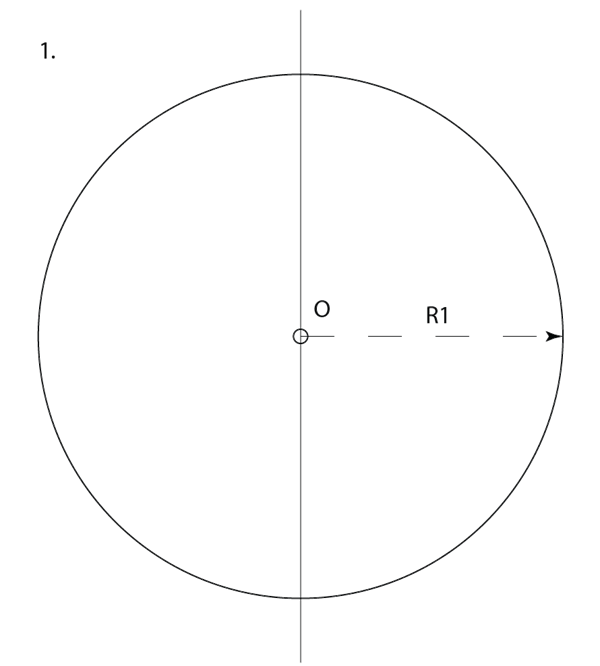
1. Starting from a vertical line, extend radius R1 to draw a circle to fill the page.
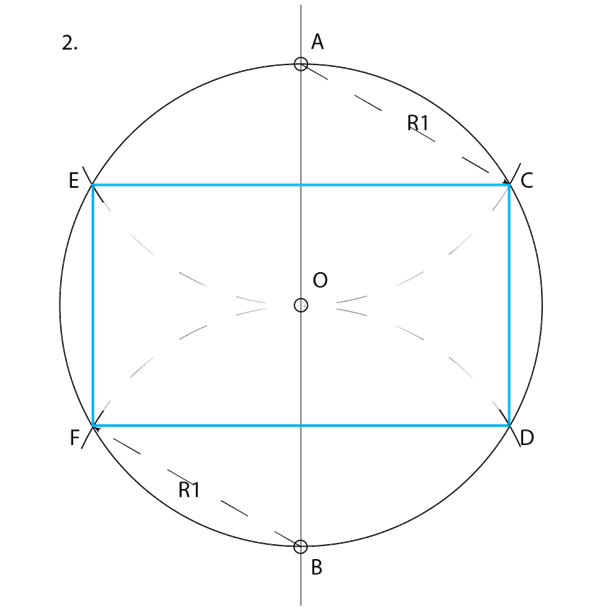
2. From points A and B, use R1 to mark arcs to establish points E, C, D, F. Then highlight the harmonic rectangle ECDF in a different color. This is the frame of our fundamental 1:√3 repeating module.
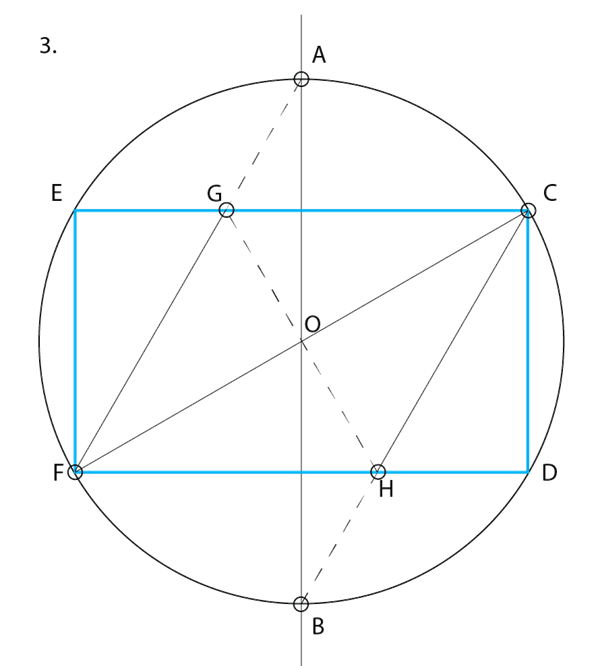
3. With a light solid line, indicate the three diagonal segments FG, FC and HC. With a broken line, indicate segment GH.
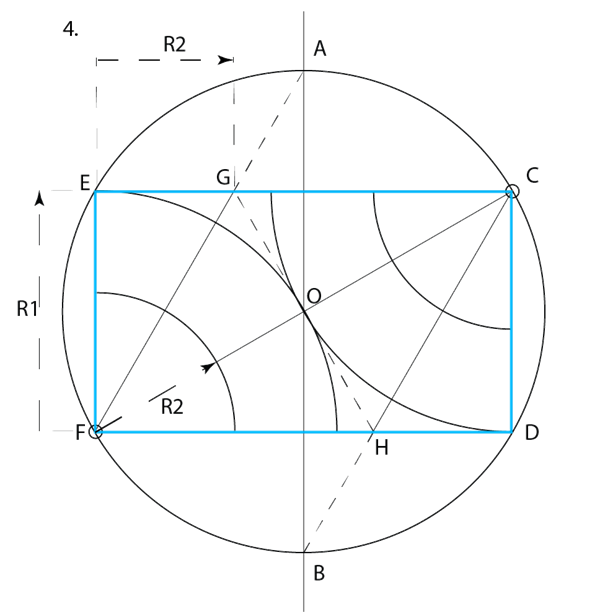
4. Anchored first at F and then at C, create from each a quarter arc (90 degrees) with radius R1 (EF). Then again from F and then C, create a second, smaller quarter arc with radius R2 (EG).
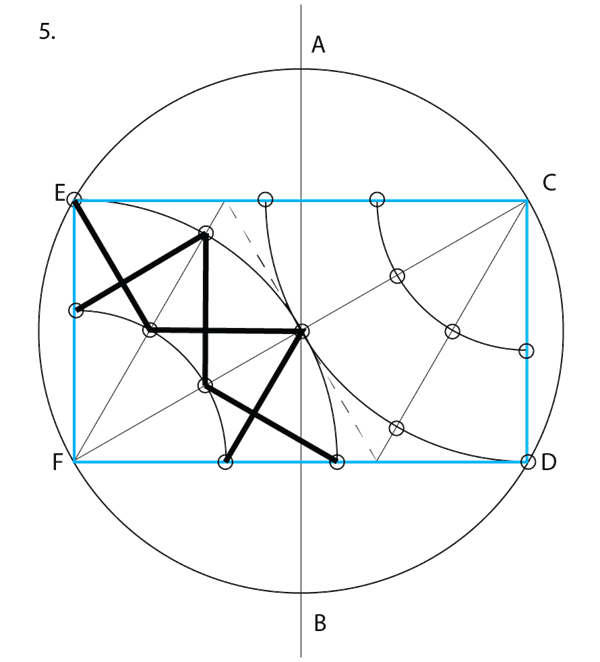
5. With a softer pencil, the final motif can now be marked in bold. Highlight the points where the radial lines from drawing 3 intersect with arcs from drawing 4. Connect these in a zig-zag manner, and the design starts to emerge: one quarter of the central 12-pointed star.
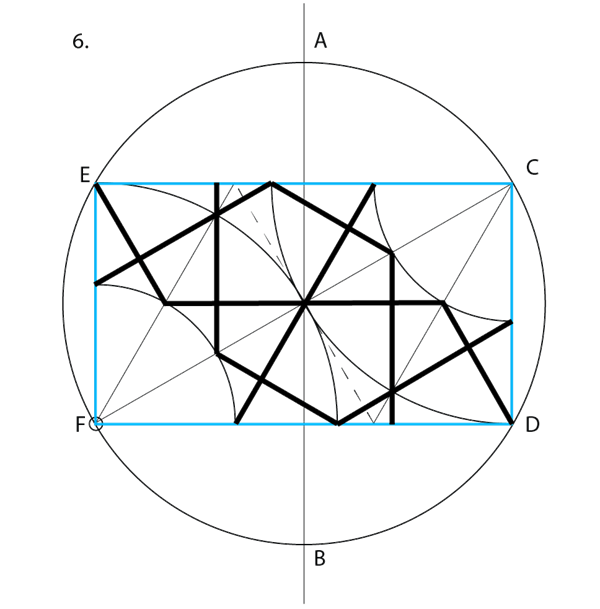
6. Continue the same process, and extend the bold lines to the frame of the rectangle to complete the fundamental repeating module.
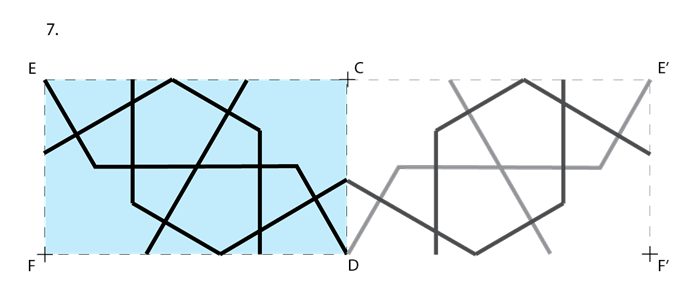
7. Place tracing paper on top of final drawing from 6. Lightly mark the quadrilateral frame ECDF. In addition, lightly mark corners C and F with small crosses: These will serve as registration marks that will help you align the design for expansion and tessellation. Use a straightedge to trace the design with a soft pencil. Then on a fresh sheet of paper, flip the tracing paper over across the vertical chord CD. Now retrace the design, also with a soft pencil: This will create, on the paper, an adjacent reflection of the original design. You will now have the design in soft pencil on both sides of the paper, left-handed and right-handed versions.
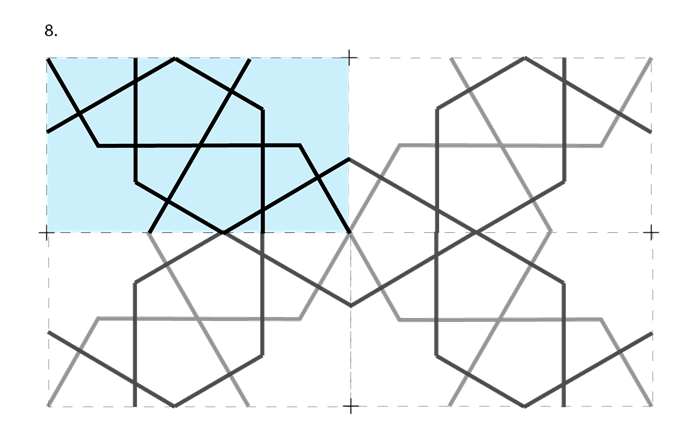
8. Repeat the process through the horizontal axis. You now have the four repeated units including the original module. Notice how these alternating reflections can be repeated indefinitely to extend the design over an infinite space: This is tessellation.
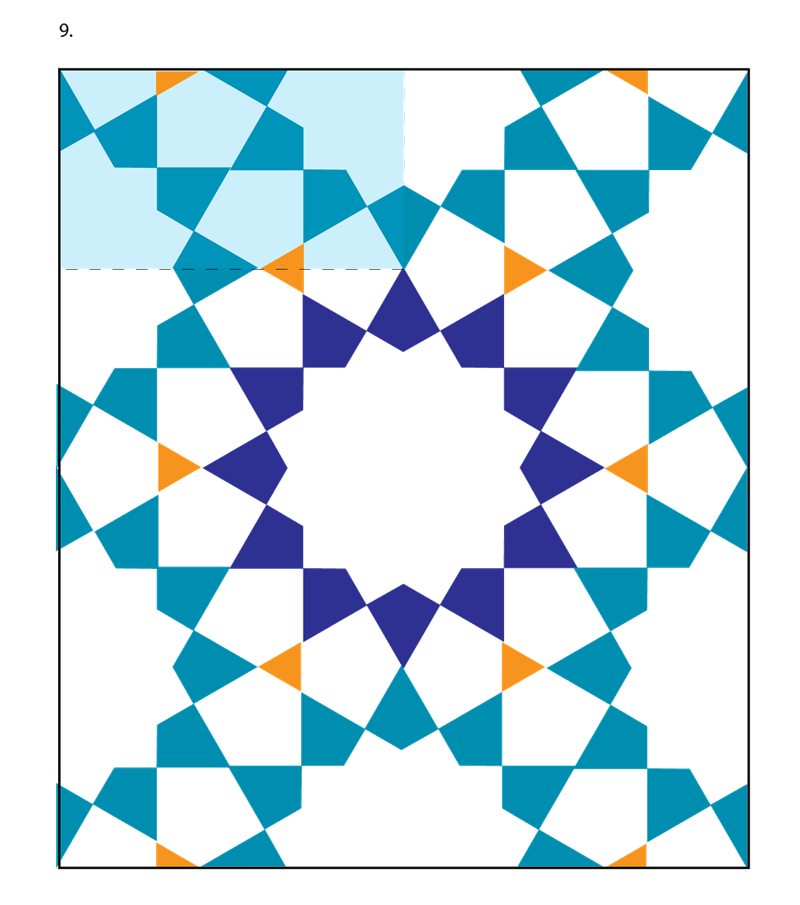
9. Repeat the process to create a reflection of the four-piece drawing in the previous step. Your final drawing will show the expanded design built up now out of eight of the basic modules. (Note that the original module is highlighted at top left). The pattern starts to become clearly recognizable as our historical design from Marrakesh. Add color, tone and further embellishments to bring out the beauty of the design.
This article first appeared on AramcoWorld in September 2022
Written by Richard Henry
